Views: 0 Author: Site Editor Publish Time: 2025-07-14 Origin: Site


Have you ever wondered how power inverters work? These devices are essential for converting DC power into AC, making them key for off-grid and backup power systems.
Charging your power inverter correctly is crucial to maintain its efficiency and extend its lifespan.
In this post, you’ll learn why proper charging matters, and how to effectively charge your inverter to ensure long-term performance.

Power inverters are devices that convert direct current (DC) into alternating current (AC), enabling the use of power from sources like solar panels or batteries to run household electronics.
They work by changing the electrical output from DC to AC, making it compatible with most electrical devices.

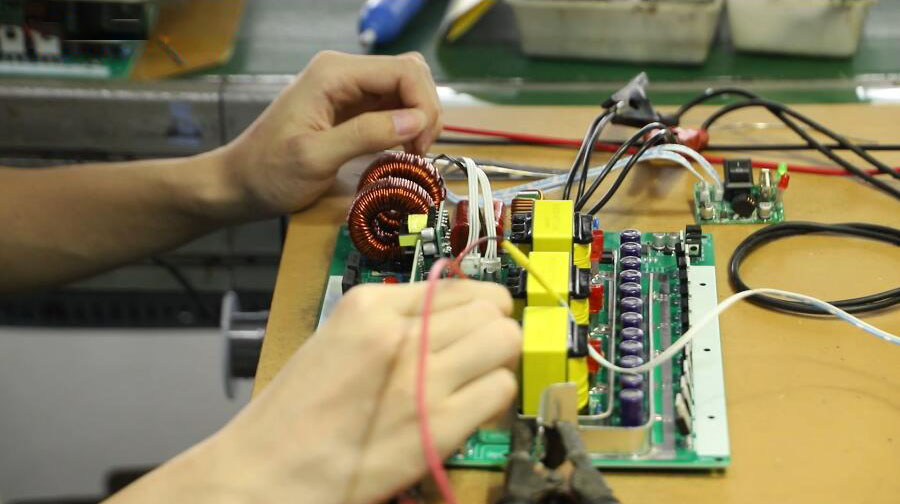
The inverter unit is the core of the device. It transforms DC power into AC. The process typically involves using transistors to switch the electrical current direction rapidly, generating an AC waveform.
Power inverters rely on batteries to store energy. These batteries come in various types, such as:
Lead-acid batteries: Known for affordability and reliability.
Lithium-ion batteries: Lightweight, efficient, and have a longer lifespan.
The battery connects to the inverter, supplying the DC power that is converted to AC. A charger is essential for recharging the battery when the power supply runs low.
Modified sine wave inverters provide an affordable solution for basic power needs. They are suitable for less sensitive devices like lights and fans but can cause issues with electronics that require stable power.
Pure sine wave inverters produce the cleanest output, closely resembling utility power. They’re more efficient and provide consistent power, which is essential for sensitive devices like computers and medical equipment.
Off-grid inverters are designed for standalone power systems, typically connected to solar panels. They convert the DC power generated by the panels into usable AC power for your home or business.
Charging a power inverter properly ensures its efficiency, extends its lifespan, and guarantees that your system operates smoothly when needed. Whether you’re using an inverter for off-grid power or as part of a backup power system, knowing how to charge it correctly is crucial. Below are the key steps to safely charge your inverter and maximize its performance.
Before you begin the charging process, always turn off the inverter. It may seem like a simple step, but it’s essential for preventing electrical sparks, which could cause damage to both the inverter and battery. When the inverter is off, there’s less risk of power surges or short circuits occurring while you’re connecting the battery.
Turning off the inverter also helps ensure that it doesn’t draw any power during the initial connection, giving the battery and inverter time to properly “sync” when you turn them back on. By turning the unit off, you also prevent potential damage from any mistakes made during the wiring process.
Proper ventilation is key when charging your inverter. Batteries can heat up during the charging process, especially in closed spaces. Heat can cause the battery to degrade, affecting its capacity to store energy, and in extreme cases, it can lead to battery failure or leakage.
Choose a well-ventilated area to charge your inverter. If you’re working indoors, place the inverter and battery in a room or space where air circulates well. Avoid placing them near heat sources or in areas with high humidity. Ideally, an open space like a garage or outdoor shed, with sufficient airflow, would be the best option.
Good ventilation ensures the battery doesn’t overheat and also helps prevent the buildup of harmful gases that some batteries release while charging. An overheated battery could lead to a decrease in charging efficiency, shortening the life of the battery and inverter.
Once the inverter is off and you’ve chosen a proper location with good ventilation, it’s time to connect the battery. Begin by connecting the positive terminal of the battery to the positive terminal on the inverter. Similarly, connect the negative terminal of the battery to the negative terminal on the inverter. Always make sure to double-check the polarity before making the connection.
Connecting the battery terminals in the correct order is essential for the proper functioning of the inverter. If the terminals are reversed, it can result in incorrect power flow and cause damage to the inverter or battery. A reversed connection could lead to overheating, short circuits, or even failure of the inverter unit.
If you're unsure about which terminal is positive or negative, it’s a good idea to refer to the inverter's manual. Most batteries and inverters will have clearly marked terminals, but it's always better to be cautious when handling electricity.
Now that the terminals are connected, it’s important to check the wiring. Use insulated tools to ensure your safety when working with electrical components. Inspect all the cables to make sure they are securely connected and there are no frayed or exposed wires. Loose connections or damaged cables can cause inefficient charging or, in the worst case, lead to electrical fires.
Look for any signs of corrosion on the battery or inverter terminals. Over time, corrosion can build up, which will create resistance and affect the charging process. To prevent this, clean the terminals regularly with a wire brush or a mixture of water and baking soda. After cleaning, reapply petroleum jelly to the terminals to help prevent future corrosion.
Once everything is securely connected and you’ve checked the wiring, it’s time to power on the inverter. Turn the inverter on and set it to charging mode. Most modern inverters will have a clear switch or button to change to this mode.
Before starting the inverter, ensure that the battery is properly connected and that there is no loose wiring. This is a crucial step because any loose wires or improper connections could prevent the inverter from charging the battery properly. In some cases, improper connections could even damage the components.
When powering the inverter, monitor the system for any unusual sounds, smells, or visible signs of malfunction. If the inverter begins to overheat, makes strange noises, or emits smoke, turn it off immediately and check the connections.
The time it takes to charge the inverter’s battery depends on several factors, most notably the size and type of the battery being used. Here’s a breakdown of how different batteries affect charging times:
Lead-acid batteries: These are the most common and affordable battery type used in inverters. However, they tend to take longer to charge, typically requiring anywhere from 8 to 12 hours for a full charge, depending on the battery’s size.
Lithium-ion batteries: Lithium-ion batteries are more efficient and charge faster than lead-acid batteries. They also have a longer lifespan, but they are more expensive. Typically, a lithium-ion battery can be fully charged in 4 to 6 hours, making them ideal for systems that need quicker turnaround times.
When choosing a battery type, consider how long you need to run your inverter. Lithium-ion batteries, while faster to charge, may not be the best option for those on a tight budget.
The capacity of the inverter is another crucial factor in determining charging time. Higher wattage inverters tend to charge batteries more quickly, but they may also use more power to run. A 1000W inverter, for example, will typically charge faster than a 500W inverter.
It’s essential to match your inverter's capacity with the battery's needs. If you have a larger battery or multiple batteries connected in parallel, you’ll need a higher-capacity inverter to charge them efficiently.
Additionally, the efficiency of the charger itself also affects charging times. Some inverters come equipped with a built-in charger that automatically adjusts to the battery's size, while others might require you to manually set the correct charging rate.
Age of the battery: Older batteries typically take longer to charge and may not hold a charge as efficiently as newer batteries. Regularly monitor the battery’s health, especially if you’ve had it for a few years.
Temperature: Charging speed can be affected by the surrounding temperature. Batteries and inverters tend to charge slower in colder environments. Ensure your charging space maintains a moderate temperature for optimal charging.
To ensure that your power inverter and batteries work at their best, it’s important to follow best practices for charging. This includes using the correct charging methods, staying safe while charging, and maintaining your system regularly.

One of the most common ways to charge an inverter is through AC-to-DC charging. This method uses an external AC power source, like grid electricity or a generator, to charge the inverter’s battery. The AC power is converted to DC power by the inverter’s internal charging circuit. This is often the most reliable method for charging, especially during power outages or in off-grid scenarios.
When using a generator, ensure that it matches the inverter's power requirements to avoid overloading. Grid power is ideal for consistent, uninterrupted charging.
Solar charging is an eco-friendly option, perfect for off-grid systems. Solar panels generate DC power, which is then converted to AC power for your appliances. To charge your inverter with solar panels, you need a solar charge controller. This device regulates the charging process, ensuring that the battery is charged properly without overcharging. Solar charging is slower than other methods but offers the benefit of being free and renewable.
The solar charge controller is crucial in managing the power from your solar panels, preventing the battery from overcharging, and optimizing the efficiency of your system.
You can also charge your inverter using an external AC power source, such as a wall outlet or a generator. This method is useful when solar power is not available, especially during the night or on cloudy days. By plugging your inverter directly into an outlet or using a generator to provide the necessary AC power, you ensure that your system stays operational without relying solely on solar energy.
However, always check the power output to make sure it matches the inverter’s input requirements to prevent damage.
Overcharging is one of the most common causes of battery damage. To prevent this, always ensure that your battery has a battery management system (BMS) in place. The BMS monitors the battery’s charge levels, preventing overcharging and ensuring optimal performance. Many modern inverters come with built-in BMS, but if yours doesn’t, you should consider adding one to your system.
Overcharging can lead to overheating, reduced battery lifespan, and in extreme cases, leaks or explosions. Always monitor the charging process, especially when using external sources like generators or solar panels.
Temperature plays a big role in charging efficiency. Extreme temperatures—whether too hot or too cold—can affect how well the battery charges and discharges. If the temperature is too high, it could damage the battery; if it's too low, the charging process might slow down significantly.
It’s important to keep the battery in a well-ventilated, temperature-controlled environment. If you're charging indoors, make sure there’s enough airflow. During hot weather, consider using cooling systems or fans to regulate the battery temperature, as overheating can significantly shorten its lifespan.
Regular maintenance is essential to keep your inverter running smoothly and your battery in top condition. This includes cleaning the terminals to remove any corrosion and checking the battery’s water levels if you’re using a lead-acid battery. Corrosion can build up on the battery terminals over time, creating resistance and reducing charging efficiency.
Use a wire brush to clean the terminals if you see corrosion, and consider applying petroleum jelly to help prevent future buildup. If your battery requires water, make sure to use distilled water and avoid overfilling. Clean connections also ensure that the battery and inverter are working efficiently, without any interruptions.
The lifespan of your battery depends largely on how well it’s maintained and how often it’s charged. Lead-acid batteries typically last between 3 to 5 years, while lithium-ion batteries can last much longer, up to 10 years. Regular charging and maintaining the correct charge levels can help extend the life of your battery.
To ensure optimal inverter performance, use regular maintenance and proper charging methods. Always follow the manufacturer's guidelines to prevent accidents. By applying best practices, you can extend both the battery and inverter lifespan, keeping your system running smoothly for years.
A: To charge a power inverter, first ensure it’s turned off and place it in a well-ventilated area. Connect the battery’s positive and negative terminals to the inverter, then power it on. Choose the appropriate charging method—AC, solar, or external power sources. Always monitor charging time and avoid overcharging to maintain battery health.
A: Best practices include using the correct charging method (AC, solar, or external sources), ensuring proper ventilation, and maintaining regular checks on battery connections. Avoid overcharging by using a battery management system (BMS) and monitor temperature to avoid overheating during charging.
A: Charging time is affected by the battery type (lead-acid vs. lithium-ion), inverter capacity, and temperature. Larger batteries and high-wattage inverters generally charge faster. Additionally, the charging method and efficiency of the charger can influence how long it takes to fully charge the inverter.